Guangzhou Zhongxin Automation Technology Co., Ltd. specializes in supplying ZXSCELL weighing sensors and STX-300N micro force sensors in the United States_
Middle ZXSCELLSensors_
ZXSCELL load cell in the United StatesEnsure fast delivery time, 100% original import, and improve complete automated weighing solutions for various industrial fields.
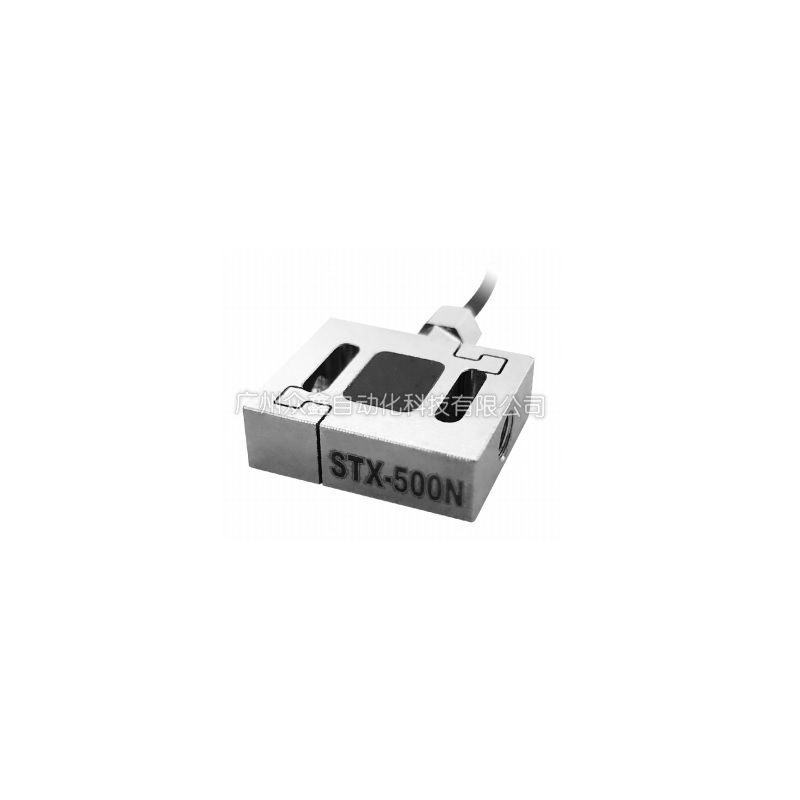
The ZXSCELL STX-300N miniature tensile pressure sensor in ZXSCELL of the United States is one of the key competitive products of our company. It has Absolute advantage price and is available in stock, original, authentic and reliable! Ensure satisfactory price and quality!
We solemnly promise: "Within three months, if there are any quality issues, we will unconditionally return or exchange the goods, refund the full payment, and do not charge any fees. Warranty 1Year, always repair!
STX-300N microForce measurementsensorProduct Features
Micro tension pressure sensor
High quality stainless steel material
Easy to install, stable and reliable
Suitable for various insertion and extraction force testing machines, button testers, and various specialized scales.
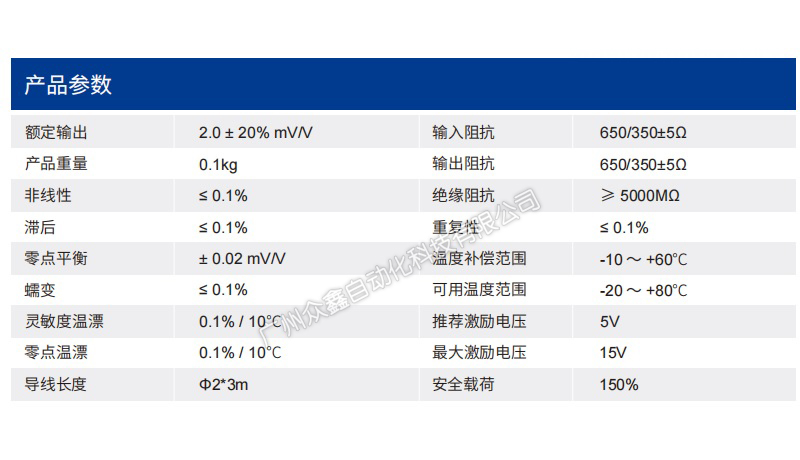
STX-300NminiatureForce measurementsensortechnical parameter
Rated output |
1.0mV/V ± 0.01 |
Zero balance |
± 1% of rated output |
Creep (30 minutes) |
± 0.050% of rated output |
Nonlinear |
± 0.3% of rated output |
lagging |
± 0.1% of rated output |
Protection level |
IP65 |
Sensitivity temperature drift |
± 0.050% of applied output/10 º C |
Zero temperature drift |
± 0.050% of rated output/10 º C |
Available temperature range |
-10 º C to+70 º C |
Temperature compensation range |
-10 º C to+30 º C |
Safety overload |
150% |
Input impedance |
387 ohms ± 20 ohms |
Output impedance |
350 ohms ± 5 ohms |
Insulation impedance |
> 5000 M ohm (50V DC) |
Recommended excitation voltage |
5 V DC/AC |
Maximum excitation voltage |
10V DC/AC |
Wire length |
2m |
Wire color |
Red(+E), Black (-E);Green (+S), White (-S) |
STX-300NminiatureForce measurementsensormatters needing attention
Weighing instrumentAfter calibration, it can be put into use. During the application process, attention should be paid to the maintenance of the weighing instrument. The maintenance workload of weighing instruments is not significant, mainly by regularly checking the working condition of weighing instruments during inspections. The basic maintenance tasks include:
1. Regularly inspect and clean to avoid impurities accumulating on tanks, sensors, and junction boxes that may affect measurement;
2. To ensure that the tested container integrated with the top plate is floating and free from other mechanical contact or jamming phenomena;
3. Attention should be paid to changes in the mechanical structure of the tank, including changes in pipelines and equipment. Any changes in the mechanical structure of the tank may affect the accuracy of weighing;
4. Regularly check the limit bolts or connecting rods to ensure sufficient clearance is maintained to avoid the limit bolts from touching the upper roof during normal production;
5. Check whether the sensors, connectors, and limit devices are excessively worn, and replace them if worn;
6. Check whether the junction box is sealed and whether various wires are securely connected;
7. Whether there is moisture or foreign objects inside or around the junction box, whether there are strong electromagnetic interference devices added near the junction box and sensors, and whether there are new objects that generate high temperatures added;
8. Check if the instrument cable is damaged and fixed on the scale body;
9. Check if the scale body moves freely; During use, there may be issues with inaccurate measurements. It is necessary to first check if there are any foreign objects relying on the weighing container pipeline or the pipeline above it, and if the limit bolts are touching, before conducting other inspections. On site, it is simple to determine whether the measurement is accurate. Sometimes, a person can be arranged to stand in the vicinity of several weighing sensors to see if the values displayed by the weighing controller are consistent and whether it is the person's weight. This method is simple and effective. If the data displayed on each sensor is inconsistent, it means there is an angle difference. It can be judged that the data measured by this weighing instrument when measuring a heavy object is inaccurate, and the height of each sensor needs to be adjusted to eliminate the difference. If there is no angular difference, but the displayed data is incorrect, the scale needs to be recalibrated. To judge whether the weighing body works normally, you can also push the weighed container or tank with your hand for a short time to see whether the displayed data changes and returns to the value before pushing. If the previous value cannot be restored, it indicates that there is a problem with the external mechanical connection of the weighing body, and there is external force supporting the tested container or tank body.
The above is the STX-300N micro force sensor_ Middle ZXSCELL sensor_ Detailed information of the ZXSCELL weighing sensor in the United States, if you are interested in the STX-300N micro load cell_ Middle ZXSCELL sensor_ If you have any questions about the price, delivery date, model and inventory of the American ZXSCELL load cell, please consult Guangzhou Zhongxin Sales Engineer Chen Gong to obtain the [STX-300N Micro Force Sensor]_ Middle ZXSCELL sensor_ New price details for ZXSCELL load cells in the United States.